

? | Home page | Tutorial | Recording


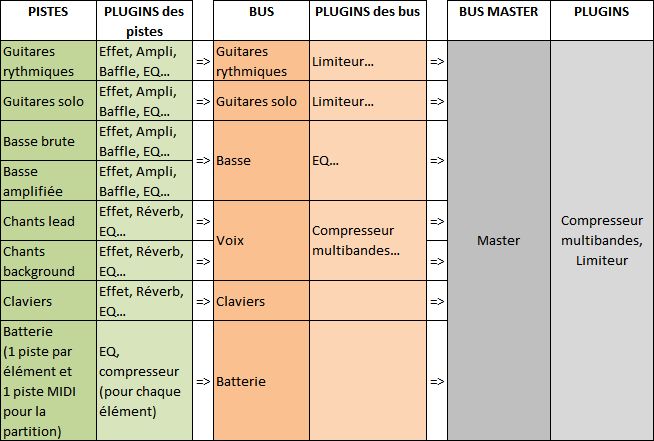
Before anything else, we need to prepare the recording session. We are not going to look for a melody, nor improvise or rehearse... we are going to properly record a song that we have already written. To avoid doing the same things over again each time I wish to record a song, I prepared a blank template which contains all the tracks and buses I need. I may naturally add or delete some elements if the template is not appropriate for the current project.
What does my template look like?
Track-wise:
- Rhythm guitar tracks (from 2 to 8 depending on the project)
- Solo guitar tracks (usually 2 tracks to make the sound thicker)
- Two bass tracks (one with the direct raw sound, and one with an amp simulation)
- Lead vocal tracks (usually one or two tracks, depends if I record it twice or not)
- Background vocals tracks (if the project demands it)
- Keyboard tracks (same thing, the number of virtual instruments will depend on the project, can be none, can be 5 or 6...)
Then we have drum tracks. There is one track per drum element. They are automatically created when I insert my virtual drum plugin:
- Kick drum
- Snare drum
- Low tom
- Medium tom
- High tom
- Hi-hat
- Crash cymbal
- Ride cymbal
- Splash cymbal
- Overhead microphone
- Room Ambiance microphone
- Piezzo microphone
- One MIDI track on which the drum score will be placed.
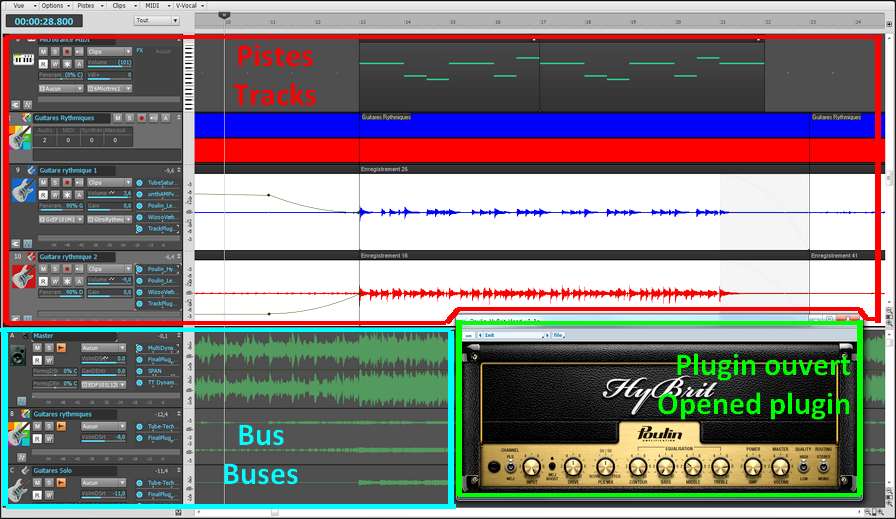
Bus-wise, I have one group for the guitars, one for the bass, one for the vocals, one for the drums, each of them is redirected towards the Master bus, which goes out throuh my studio monitors. It looks like this:





Recording an acoustic real drum kit is far from being easy, even for professional sound engineers. It a time-consuming process, it's frequent to spend several hours placing the microphones around the drum elements before you can actually record. But we are in a home studio, and we will have to deal with a software drum kit, based on midi files...
First of all, why start with the drums? The answer is simple, we will use drums as a metronome. The drums sound will guide us and help us follow the tempo. This will allow for an even recording and the song will not speed up or slow down unintentionally. Of course, variations can be interesting and bring some life to an otherwise mechanical tempo, but let's consider that a studio session seeks recording perfection, even though it's only a home studio.
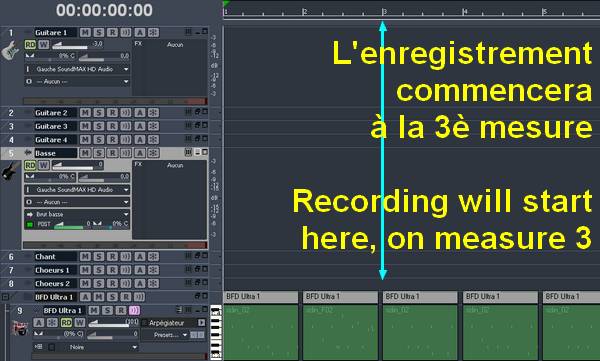
I usually have no idea what my final drum track will sound like. Actually, I only adjust it when the rest of the song is finished. But I still need its metronome function to record all other instruments. Thus, I create a drum track which repeats itself over and over again, and I try to have this loop match what I am about to play (no punk rhythm to record a ballad). For instance, I'll use one of these patterns:

Let's not forget we are recording in a home studio, in an appartment and it is simply impossible to play with a good old 100-watt tube amplifier, without the neigbors calling the police. So we are going to have to record the guitars and the bass directly through the audio interface. No real amplifier, no microphones involved. The latter solution would be preferable, but on of the benefits of direct recording, coupled with amplifier simulators, is that you can always edit the sound later, without having to re-record. Just change the settings and you're done.
So now... bass or guitars first? There isn't one clear answer. Bass and drums are the foundation, the rhythm base of a song and everything else should rely on them. But other factors could also be taken into consideration: for instance, the person recording may be more comfortable with a guitar than a bass, and will rather play guitar first. Or maybe the song has a very important bass riff that compels you to record it first. In any case, you are the one who can decide. If you are uncertain, then the drum / bass duo is a safe bet. If this is in place, then the rest can easily be added.
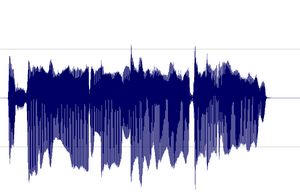
Guitar or bass, the recording process will be the same. Plug your guitar into the pre-amp, the pre-amp is connected to the audio interface (or plug your guitar directly into the audio interface if using the interface's pre-amp), and set the recording level. This is very important! Before recording anything, check that you are not going to go beyond the maximum level (0 dB, zero decibel). In a home studio, you won't have a sound engineer besides you to make adjustments on the fly, while you are playing. You are the one to take precautions. How can you do that? Simple: try and adjust, it doesn't take long and will prevent you from making a perfect take, then realize the levels were too low or too high, forcing you to do it all over again.
Have a try: for a rhythm guitar for example, play the loudest parts and set the preamp and audio interface volume levels in such way that when you play the loudest, the recording level doesn't go beyond -6 dB. The absolute maximum that you should not reach or go beyond is zero dB. If you play in your try the same way you play during the actual recording, then you can be certain the recording level will be correct. If your average level is between -9 db and -6 dB, then your level is sufficient and you have a margin of error before clipping.
Clipping is the term used to indicate that you reach or go beyond 0 dB. Clipping is your enemy :-)
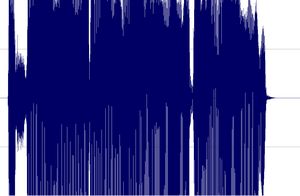
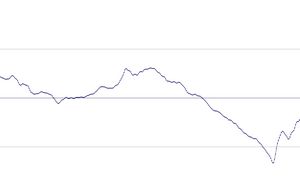
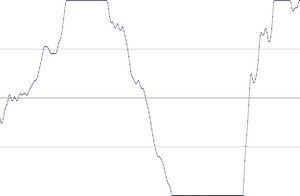

I prefer to record them last but there are no rules. If you prefer to record them first, then do so.
To record vocals, make sure the place is quiet, shut the door, tell the people who live with you to be quiet, and do not record while your neighbor is drilling holes through his kitchen walls! Also, turn off your monitors and use a headset instead to avoid recording the playback with your microphone.
Condenser or dynamic microphones?
Dynamic microphones are solid, they don' need a power source, they can take heavy acoustic pressure (like a kick drum or a saxophone) and they are not too expensive. They are also less sensitive to surrounding noises than condenser microphones. The cons are they lack clarity in the high range, which renders takes less clear and defined than with condenser microphones. They can be used with Jack or XLR plugs.
Condenser microphones are much more responsive and accurate. Their high sensitivity is double-edged, because they will capture any noise when recording. The fans of your PC are noisy? Chances are this noise will be recorded. Sound comes out of your headset? It will be recorded by your condenser microphone. Children are loudly playing outside? You might get that too. However, some condenser microphones are called "cardioid", or "hyper cardioid", and they only record what comes from a specific direction, ignoring (more or less) other sound sources from other directions. On the contrary, omnidirectional microphones record what comes from anywhere. Not ideal for a home studio. Condenser microphones are also more fragile (don't knock them) and must be powered through a "phantom power", whose standard is 48 volts. This kind of power is either present on your audio interface and can be turned on and off with a button, or it will require the use of an external phantom power source that you will then connect to your audio interface. You have to use 3-pin XLR plugs that carry the phantom power current. Finally, condenser microphones are usually rather expensive, some of them cost several thousand euros (or dollars, or pounds), but only professional studios or rich amateurs can afford those. On the plus side, the sound you get with a condenser microphone will have the best quality.
Be cautious though, a good dynamic microphone is worth better than a bad condenser microphone. No big secret here, for microphones like for anything else, very low prices are rarely synonymous with good quality.
A few known and renowned microphone brands: AKG, Milab, Neumann, Rode, Sennheiser, Shure...
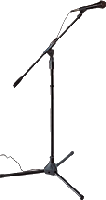
Some pieces of advice: buy a microphone stand and a pop filter (you can also make one yourself with wire and a piece of tights from your wife / girlfriend / mother / daughter / neighbor). The stand will prevent you from manually holding your microphone and thus produce handling noises. As for the pop filter, it prevents the air to hit the microphone and produce unwanted blowing sounds when you pronounce some letters such as "p" or "b".
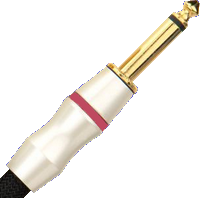
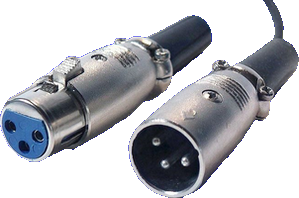
Jack plug (left) and XLR (right)


No need to go on and on forever, recording is rather easy. As long as you pay attention to your recording levels and take care over your takes, you should get a satisfying result, good enough to finalize the song

Messages page # 1 2 3 4 5 6 7 8 9 10 11 12 13 14 15 16 17 18 19 20 21 22 23 24 25 26 27 28 29 30 31 32 33 34 35

lgwn
le 08/05/2012 à 18h42
Merci pour tout, super boulot.

Malandain
le 24/04/2012 à 14h37
Bonjour,
J'ai un dr4d akai qui enregistre en 16 bits (44/48khz).
Je relie numériquement mon dr4d à ma carte son (spdif) qui est reliée a mon ordi en usb. Ma D.A.W. est Mixbus qui enregistre en 32/24/16 bits.
Pour un bon enregistrement, faut-il mieux mettre tout en 16 bits ? (dr4d + carte son + D.A.W.)
Peut-on enregistrer le 16 bits du dr4d en 24 bits carte son + D.A.W. ?
Ou 16 bits du dr4d vers 16 bits carte son et 24 bits Mixbus ?
J'ai l'impression que tout en 16 bits, c'est mieux.
Merci d'éclairer ma lanterne.
A. Malandain
* * * * * * * * * * * * * * * *
<em>Bonjour,
Bienvenue sur mon site !
Puisque le dr4d enregistre en 16 bits, il semble logique de penser que tu ne gagneras a priori pas en qualité en réglant carte son et séquenceur sur 24 bits.
C'est vrai si tu te contentes de "transférer" les sons enregistrés avec le dr4d vers ton séquenceur sans les traiter ensuite.
En revanche, si tu fais du mix depuis Mixbus, en utilisant des effets, là il vaut mieux être en 24 bits, car les calculs effectués par le logiciel seront plus précis.
Il est très probable que la différence sera imperceptible, et travailler en 16 bits de bout en bout ne va pas dégrader le son obtenu.
Je ne pense pas que beaucoup de gens soient capables d'entendre la différence entre un traitement effectué en 16 bits et le même traitement effectué en 24 bits.
Néanmoins, la différence existe au niveau de la précision des calculs, et l'accumulation des effets sur différentes piste peut entraîner en 16 bits un risque (très faible) d'avoir quelques petites approximations qui vont se traduire par une légère dégradation du son. Encore une fois, c'est théorique, ça peut arriver, mais ça ne sera pas forcément quelque chose qui va s'entendre.
Donc si tu es pointilleux, je te conseille de régler ta carte son et ta D.A.W. sur 24 bits.
Grebz</em>

Franck
le 02/04/2012 à 03h34
Bonjour Grebz,
J'ai vu que tu utilisais Sonar X1 Producer.
J'aimerais bien si tu veux que tu me donnes quelques truc pour ce logiciel car sur Internet, il n'y a que des vidéos anglo et je ne les comprend pas toutes.
Merci d'avance.
* * * * * * * * * * * * * * * *
<em>Bonjour,
Pour ceux que ça intéresse, j'ai fait ce petit guide rapide pour savoir comment intégrer et utiliser un VSTi (synthé virtuel) dans Sonar X1. Ce ne sont que les bases, mais ça pourra servir à ceux qui sont perdus.
Télécharger "<a href="/Downloads/tutorial_homestudio/Synthés virtuels dans Sonar X1.pdf">Synthés virtuels dans Sonar X1</a>" (Fichier PDF de 1,20 Mo)
Grebz</em>

Molten
le 13/03/2012 à 01h27
Merci mon ami : Excellent !!!

Alain6465
le 08/03/2012 à 00h54
Merci pour ton site qui est très utile pour un novice comme moi dans la MAO, même si je fais de la musique depuis longtemps.
J'ai l'intention de revendre mon matériel hardware et d'acheter un séquenceur en soft. Je penche pour Sonar car j'aime bien l'interface graphique de studio instrument, mais je ne sais quelle version choisir, Sonar Studio ou Producer ou X1 etc.
De plus, je n'ai pas vu la VS-100 de Cakewalk dans tes choix de carte son, qu'en penses-tu ? Serait-ce un bon choix, car elle a été conçue pour être utilisée avec Sonar je crois.
Merci pour ta réponse et pour tes conseils très pédagogiques !
* * * * * * * * * * * * * * * *
<em>Bonjour,
Merci de ta visite sur mon site.
Pour l'interface V-Studio 100, je ne l'ai pas listée car je ne l'ai jamais utilisée et j'ai simplement référencé quelques marques connues, mais ce n'est pas du tout un choix exhaustif. Je suis un simple passionné de musique, pas un professionnel du test, et je ne me permets de parler en détail que du matériel et des logiciels que je connais !
J'ai été voir divers avis d'utilisateurs de la VS-100 et ils sont globalement très positifs, tant en ce qui concerne la qualité des pré-amplis que de l'aspect pratique des différents boutons présents sur l'interface, qui donnent un accès direct à de nombreuses fonctions du séquenceur utilisé. Effectivement, la carte a été conçue par Roland, qui est aussi l'éditeur de Sonar, et donc Sonar reconnaît immédiatement la VS-100 et attribue directement les bonnes fonctions aux bonnes touches de l'interface. Mais la VS-100 fonctionne aussi très bien avec les autres séquenceurs, avec lesquels il est tout à fait possible de configurer les boutons pour leur attribuer les fonctions voulues. Conclusion : même si je ne l'ai jamais utilisée moi-même, cette interface me semble être un bon choix.
Pour le choix d'un séquenceur maintenant... En tant qu'utilisateur de Sonar depuis plusieurs années, je vais évidemment te dire que c'est un très bon choix. L'interface me convient, je le trouve assez intuitif à utiliser et largement assez riche et puissant pour moi. Point important : Sonar est livré avec beaucoup de plugins (VST, VSTi) et outils qui permettent de travailler sans avoir impérativement besoin d'acheter des outils complémentaires. Mais restons objectif, les Cubase et autres Reaper ou Presonus Studio One sont aussi d'excellents logiciels. Je crois que c'est surtout une question de feeling, de coup de cœur... et de prix ! Tous les séquenceurs sérieux permettent de parvenir plus ou moins aux mêmes résultats, chacun avec sa méthode et son organisation.
Dans la gamme Sonar, le dernier en date est Sonar X1, qui existe en 3 versions : Essential, Studio et Producer.
La différence se trouve dans le nombre d'outils livrés avec le logiciel.
<strong>Essential</strong> est la version la moins complète et la moins chère. Elle est disponible uniquement en version 32 bits et est limitée à 64 pistes audio (ce qui suffit à la plupart des gens, moi y compris). Elle ne propose que les fonctions de base (pas de synthés, batterie logicielle, outils de compression évolués, etc.). Environ 90 euros.
<strong>Studio</strong> est disponible en versions 32 ou 64 bits, n'a pas de limitation du nombre de pistes, et possède des outils complémentaires (divers VST, VSTi, V-Vocal pour corriger les problèmes de justesse des voix ou instruments, Audio Snap pour caler des enregistrements sur le tempo). Environ 180 euros.
Enfin, <strong>Producer</strong> est la version la plus complète et la plus chère bien sûr. Elle contient en plus différents outils d'excellente qualité comme le ProChannel (compresseur, EQ, saturation), Session Drummer 3, un logiciel de batterie plutôt bien foutu, les VSTi Dimension Pro (très bon synthé, très complet) et TruePianos (version allégée d'un piano virtuel de très bonne qualité à mon goût). Environ 390 euros.
À sa sortie fin 2010, X1 n'était pas super stable et plantait un peu trop souvent à mon goût. Du coup, en attendant les correctifs, je continuais à utiliser la version précédente, mais c'est très frustrant et décevant de payer pour un logiciel qui ne marche pas aussi bien que ce que vous attendez. Mais heureusement, les correctifs ont rapidement amélioré la situation et la version de X1 actuellement en vente est nickel.
J'ai encore quelques plantages de temps à autres, mais j'ai pu constater que c'était toujours à cause de certains VST que j'ai ajoutés. La faute donc aux programmeurs de ces VST qui perturbent Sonar dans certaines conditions (pas toujours très claires à déterminer, d'ailleurs). Ça n'arrive d'ailleurs qu'avec des VST gratuits. Je n'ai jamais eu de plantages à cause de VST du commerce. Normal, puisque les conditions de tests ne sont pas les mêmes... Entre un bidouilleur passionné qui développe son VST dans son coin et une société qui peut tester sur tous les séquenceurs du marché, il y a une différence. N'empêche que beaucoup de VST gratuits sont non seulement utiles, mais aussi performants que certains logiciels du commerce.
Grebz</em>
